This topic provides detailed instructions to help you get up and running as quickly as possible with the xamRichTextEditor ™.
The following topics are prerequisites to understanding this topic:
This topic contains the following sections:
This procedure explains step by step the operations necessary for adding xamRichTextEditor to your page.
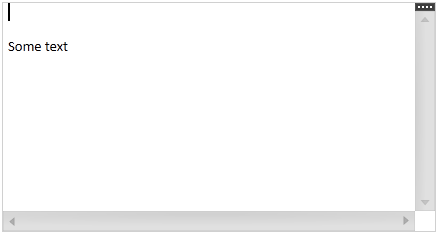
The following screenshot is a preview of the result.

The following steps demonstrate how to add xamRichTextEditor to your page.
Add the following NuGet package reference to your project:
Infragistics.WPF.RichTextEditor
For more information on setting up the NuGet feed and adding NuGet packages, you can take a look at the following documentation: NuGet Feeds.
If you need to export or import external rich content add the following additional NuGet package references:
Infragistics.WPF.RichTextDocument.Html
Infragistics.WPF.RichTextDocument.Rtf
Infragistics.WPF.RichTextDocument.Word
Add the following namespaces:
In XAML:
xmlns:ig="http://schemas.infragistics.com/xaml"In C#:
using Infragistics.Controls.Editors;
using Infragistics.Documents.RichText;
In Visual Basic:
Imports Infragistics.Controls.Editors
Imports Infragistics.Documents.RichTextCreate and put the xamRichTextEditor on your page:
In XAML:
<ig:XamRichTextEditor x:Name="xamRichTextEditor1">
</ig:XamRichTextEditor>Optionally, If you need to export or import external rich content add the following:
In XAML:
<ig:XamRichTextEditor.ClipboardSerializationProviders>
    <ig:RtfSerializationProvider />
    <ig:WordSerializationProvider />
</ig:XamRichTextEditor.ClipboardSerializationProviders>
In C#:
this.xamRichTextEditor1.ClipboardSerializationProviders.
    Add(RtfSerializationProvider.Instance);
this.xamRichTextEditor1.ClipboardSerializationProviders.
    Add(WordSerializationProvider.Instance);
In Visual Basic:
Me.xamRichTextEditor1.ClipboardSerializationProviders.
    Add(RtfSerializationProvider.Instance)
Me.xamRichTextEditor1.ClipboardSerializationProviders.
Add(WordSerializationProvider.Instance)Optionally, create the RichTextDocument and set it to the xamRichTextEditor ’s Document property:
In XAML:
<ig:XamRichTextEditor.Document>
    <ig:RichTextDocument />
</ig:XamRichTextEditor.Document>
In C#:
RichTextDocument doc = new RichTextDocument();
this.xamRichTextEditor1.Document = doc;
In Visual Basic:
Dim doc As New RichTextDocument()
Me.xamRichTextEditor1.Document = docOptionally, the following code adds a plain text paragraph to the document:
In C#:
RichTextDocument doc = this.xamRichTextEditor1.Document;
ParagraphNode pn = new ParagraphNode();
pn.SetText("Some text");
doc.RootNode.Body.ChildNodes.Add(pn);
In Visual Basic:
Dim doc As RichTextDocument = Me.xamRichTextEditor1.Document
Dim pn As New ParagraphNode()
pn.SetText("Some text")
doc.RootNode.Body.ChildNodes.Add(pn)The following topics provide additional information related to this topic.