
This topic demonstrates how to configure the Others category for the XamPieChart™ control. At the end of the topic, the complete code sample is provided.
The topic is organized as follows:
Sometimes, the underlying data for the Pie Chart control will contain many items with small values. In this case, the Others category will permit automatic aggregation of several data values into a single slice.
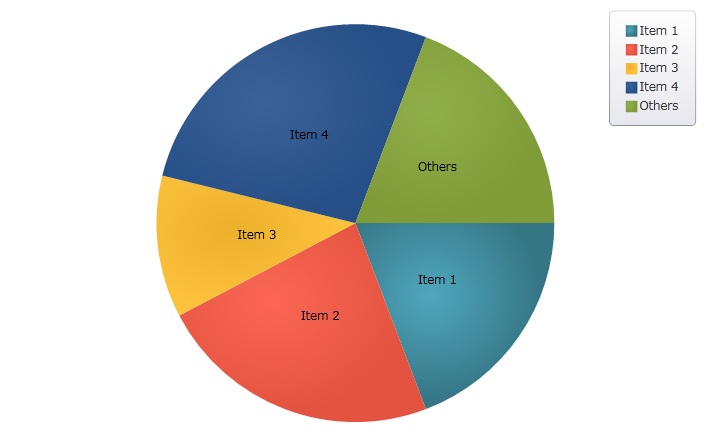
Following is a preview of the final result:
Figure 1: A pie chart featuring the Others category as implemented by the sample code
This topic assumes you have already read the Data Binding topic, and uses the code therein as a starting point.
Defining a Data Model.
Configuring an instance of the Data class as the ItemSource for a Pie Chart
Configuring the Others category
(Optional) Verifying the result
Define a Data Model .
Define a simple data model called DataItem. Then, define a Data collection containing several DataItems of relatively small value:
In C#:
    public class DataItem
    {
        public string Label { get; set; }
        public double Value { get; set; }
    }
    public class Data : ObservableCollection<DataItem>
    {
        public Data()
        {
            Add(new DataItem { Label = "Item 1", Value = 5 });
            Add(new DataItem { Label = "Item 2", Value = 6 });
            Add(new DataItem { Label = "Item 3", Value = 3 });
            Add(new DataItem { Label = "Item 4", Value = 7 });
            Add(new DataItem { Label = "Item 5", Value = 1 });
            Add(new DataItem { Label = "Item 6", Value = 1 });
            Add(new DataItem { Label = "Item 7", Value = 1 });
            Add(new DataItem { Label = "Item 8", Value = 1 });
            Add(new DataItem { Label = "Item 9", Value = 1 });
        }
    }
Configure an instance of the Data class as the ItemSource for a Pie Chart .
In XAML:
<Grid x:Name="layoutRoot">
     <ig:XamPieChart x:Name="pieChart"
                    LabelMemberPath="Label"
                    ValueMemberPath="Value"
                    LabelsPosition="BestFit"
                    Legend="{x:Reference legend}">
      <ig:XamPieChart.ItemsSource>
        <local:Data/>
      </ig:XamPieChart.ItemsSource>
    </ig:XamPieChart>

    <ig:ItemLegend x:Name="legend"/>

</Grid>
The Pie Chart will now display as shown in Figure 2:

Figure 2: The pie chart, before configuring the Others category
Configure the Others category .
Items 5 through 9 are very small, giving the chart a cluttered appearance. Assign these items to the Others category using the OthersCategoryThreshold, OthersCategoryType, and OthersCategoryText properties on XamPieChart:
In XAML:
<ig:XamPieChart Name="pieChart"
                OthersCategoryThreshold="2"
                OthersCategoryType="Number"
                OthersCategoryText="Others" />
Here, the OthersCategoryThreshold is set to 2, and OthersCategoryType is set to Number. Therefore, items with value less than or equal to 2 will be assigned to the “Others” category.
(Optional) Verify the result.
Run the application. The Pie Chart should now display as shown in Figure 1, above.