With the addition of the WinInkProvider™ to the Infragistics suite of Windows Forms products, it becomes very easy to ink-enable the Infragistics elements in your application. If you are deploying an application on the TabletPC platform, follow these simple steps to add ink capability to the WinGrid™ elements in your application:
Add the UltraGrid element or elements to your form.
Locate the UltraInkProvider element in the Visual Studio toolbox.
Double-click the UltraInkProvider element in the toolbox. The element will be added to the component tray of your form.
This is all that is required. All of the embeddable editors that the grid uses for text input are now ink-enabled. You (and your users) will see a pen icon button on the right side of any text input field. The user clicks this button with the stylus to open the text input panel for the element.
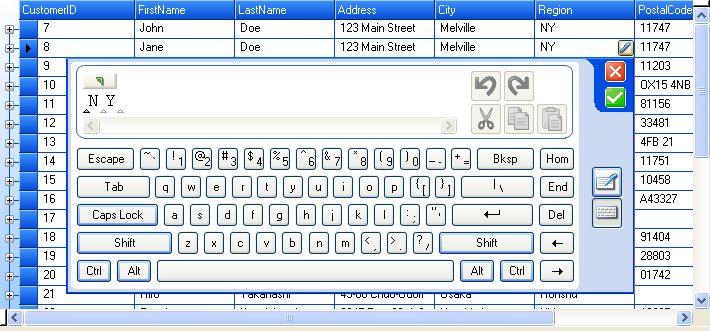
The following snapshot shows ink enabled WinGrid. The text input panel has two parts: Keyboard input and Ink input. This snapshot displays the keyboard input portion. Clicking on the "pen" button on the right switches to the ink input mode.

The following is specific to UltraWinGrid.
You can set the ShowInkButton property of the Override object to prevent WinGrid from showing ink buttons in WinGrid. ShowInkButton property is exposed off the UltraGridColumn object as well so you can enable/disable ink buttons on a per column basis.
By default the UltraWinGrid displays ink buttons when the user hovers the mouse over the cell. You can choose to always display ink buttons by setting the ButtonDisplayStyle property on the UltraGridColumn objects.