Version

Getting Started with WebExcelExporter

This is a great place for you to start learning about the WebTabExcelExporter™ component, and its key features and functionalities.

What You Will Accomplish

You will learn how to set up and use WebExcelExporter to export WebDataGrid / WebHierarchicalDataGrid data into an Excel™ file format.

Before You Begin

In order to compile and run the samples illustrated here, you will need to install Ultimate UI for ASP.NET v. 10.2. You will also need a running instance of SQL Server (either Express or any other edition), and you will need to have the NorthWind data base attached to your SQL Server instance. You can either install the NorthWind data base following instructions at: http://msdn.microsoft.com/en-us/library/aa276825(SQL.80).aspx or download the data base directly from: http://www.microsoft.com/downloads/details.aspx?familyid=06616212-0356-46a0-8da2-eebc53a68034&displaylang=en

Follow these steps:

  1. Create a web page (ASP.NET Web Form) with WebDataGrid bound to some Data Source

In HTML:

<ig:WebDataGrid runat="server" ID="wdgCustomers"
        DataSourceID="SqlDsCustomers"
        DataKeyFields="CustomerID"
        AutoGenerateColumns="
        >
            <Columns>
                <ig:BoundDataField Key="Country" DataFieldName="Country" Header-Text="Country" />
                <ig:BoundDataField Key="City" DataFieldName="City" Header-Text="City" />
                <ig:BoundDataField Key="CompanyName" DataFieldName="CompanyName" Header-Text="Company" />
                <ig:BoundDataField Key="ContactName" DataFieldName="ContactName" Header-Text="Contact" />
                <ig:BoundDataField Key="Phone" DataFieldName="Phone" Header-Text="Phone" />
            </Columns>
        </ig:WebDataGrid>
        <asp:SqlDataSource runat="server"ID="SqlDsCustomers"ConnectionString="<%$ ConnectionStrings:NorthwindConnectionString %>" SelectCommand="SELECT * FROM [Customers] ORDER BY [Country]">
        </asp:SqlDataSource>
  1. Drag a WebExcelExporter control from the Visual Studio Toolbox onto your page:

    1. Set the WebExcelExporter’s property ExportMode to Download

    2. Set the control’s ID property to WebExcelExporter

    3. Set the control’s DownloadName property to “ExportedData”

In HTML:

<ig:WebExcelExporter runat="server" ID="WebExcelExporter" ExportMode ="Download" DownloadName="ExportedData" />
  1. Drag a Button control from Visual Studio Toolbox onto your page:

    1. Set the button’s ID property to btnExport

    2. Set the control’s Text property to “Export Data”

    3. Set the control’s OnClick to “btnExport_Click”

    4. Define the “btnExport_Click” handler in the code-behind and call one of the WebExcelExporter Export() method overloads

In Code Behind (C#):

protected void btnExport_Click(object sender, EventArgs e)

{

this.WebExcelExporter.Export(this.wdgCustomers);

}

In HTML:

<asp:Button runat="server" ID="btnExport" Text="Export Data" OnClick="btnExport_Click" />
  1. Run the application.

  2. Click the “Export Data” button.

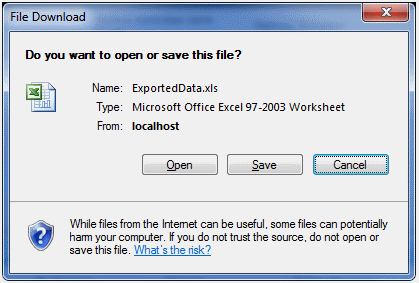
After clicking the “Export Data” button, your browser will ask you whether you want to open or save file named “ExportedData.xls”:

WebExcelExporter Getting Started with WebExcelExporter 01.png
Note
Note:

The ExportedData.xlsx file will only contain the grid’s visible data. If you want to export all the data in the data source, please refer to Exporting All Data in Data Source.