
One way WebSchedule™ can be used in a Web application is to place WebSchedule views into a reusable ASP.NET UserControl that collects together the WebScheduleInfo™ and WebSchedule data providers into one place. The user control takes responsibility for ensuring the WebScheduleInfo and any necessary database connections are set-up correctly. In this walkthrough you are going to create a simple example of a UserControl for your WebSchedule application.
Before beginning this walkthrough, you should have some experience creating UserControls. You should be familiar with the relationship between WebScheduleInfo, the WebSchedule data provider, and the WebSchedule view elements. It would greatly help if you already have some experience putting WebSchedule elements together onto a WebForm and connecting them to a database, as described in the Quick Start walkthrough. In this project you’re going to start with an empty WebForm (this represents your eventual web application) and a UserControl (which combines several WebSchedule elements together into one reusable package).
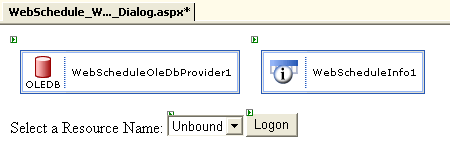
Add a WebScheduleInfo, a WebScheduleOleDbDataProvider and a WebDayView from the Toolbox to the WebUserControl1.ascx file in the Visual Studio .NET designer.
These three WebSchedule elements work together to present daily scheduling information to the end user. However, there is a certain amount of cross-connection that needs to take place that a UserControl can help satisfy. In addition, you will be customizing some standard qualities of the WebDayView to make your UserControl more useful.
At this point, you may also follow the steps described in the Connecting WebSchedule to a Database in Visual Studio 2005 walkthrough to customize where your user control’s data connectivity comes from. For the purposes of this walkthrough, we will assume the default WebSchedule database is being used.
Connect the WebSchedule components to the WebScheduleInfo during the Page_Load event.
Double-click anywhere on the design surface of your WebUserControl1.ascx page to add this code to the Page_Load event handler:
In Visual Basic:
Private Sub Page_Load(ByVal sender As Object, ByVal e As EventArgs) _
	Handles MyBase.Load
	' Connect each WebSchedule element to the WebScheduleInfo.
	Me.WebDayView1.WebScheduleInfo = WebScheduleInfo1
	Me.WebScheduleOleDbProvider1.WebScheduleInfo = WebScheduleInfo1
End Sub
In C#:
private void Page_Load(object sender, System.EventArgs e)
{
	// Connect each WebSchedule element to the WebScheduleInfo.
	this.WebDayView1.WebScheduleInfo = WebScheduleInfo1;
	this.WebScheduleOleDbProvider1.WebScheduleInfo = WebScheduleInfo1;
}
These connections must be done in code-behind because the control ID’s that may be persisted during design-time through the WebScheduleInfoID property cannot always successfully find their correspondents if these controls are nested within UserControls. This is because a UserControl qualifies every control it contains by it’s own instance name. This instance name is only assigned when the UserControl has been added to a Page making it impossible to predict in advance (for example, the first instance of UserControl1 added to a Page will have the name, "UserControl11" and a WebDayView element nested within it would be named "UserControl11_WebDayView1"). You can avoid problems related to broken connections of controls that may span different user controls by always assigning the control reference property at run-time, in this case the WebScheduleInfo property on these elements.
Add an ActiveResourceName property to the WebUserControl.ascx code-behind file.
In order for developers to have an easy time customizing your UserControl for various resources that they want to use WebSchedule with, it would be a good idea to expose the WebScheduleInfo’s ActiveResourceName property. This will allow you to customize the WebUserControl to different resources when it is dropped onto your WebForm.
In Visual Basic:
Public Property ActiveResourceName As String
	Get
		Return Me.WebScheduleInfo1.ActiveResourceName
	End Get
	Set
		Me.WebScheduleInfo1.ActiveResourceName = Value
	End Set
End Property
In C#:
public string ActiveResourceName
{
	get
	{
		return this.WebScheduleInfo1.ActiveResourceName;
	}
	set
	{
		this.WebScheduleInfo1.ActiveResourceName = value;
	}
}
Add an ActiveDay property to the WebUserControl.ascx code-behind file that specifies the active day in local time.
By default, the WebSchedule specifies it’s ActiveDayUtc property in Universal Time to maintain timezone independence. Some developers may prefer setting their active day in local time, and certainly exposing the active day from your user control is important, so add the read/write property shown below to expose active day based on local time.
In Visual Basic:
Public Property ActiveDay As DateTime
	Get
		Dim utc As SmartDate = Me.WebScheduleInfo1.ActiveDayUtc
		Return utc.ToLocalTime().Value
	End Get
	Set
		Dim local As SmartDate = New SmartDate(Value)
		Me.WebScheduleInfo1.ActiveDayUtc = local.ToUniversalTime()
	End Set
End Property
In C#:
public DateTime ActiveDay
{
	get
	{
		SmartDate utc = this.WebScheduleInfo1.ActiveDayUtc;
		return utc.ToLocalTime().Value;
	}
	set
	{
		SmartDate local = new SmartDate(value);
		this.WebScheduleInfo1.ActiveDayUtc = local.ToUniversalTime();
	}
}
Rebuild your project and add a WebUserControl1 to your WebForm.
You’ve made a lot of changes and now it’s time to see if they’ll compile. Once you’ve built you can add your user control to your main application’s WebForm and set the properties on it, like ActiveDay and ActiveResourceName.
You have created an ASP.NET UserControl which successfully manages the routine connection of WebSchedule elements and exposes two of WebScheduleInfo’s major properties. As a next step, you can experiment with this control by adding additional properties to expose, and establishing some default customizations that you would like every instance of this UserControl to have.