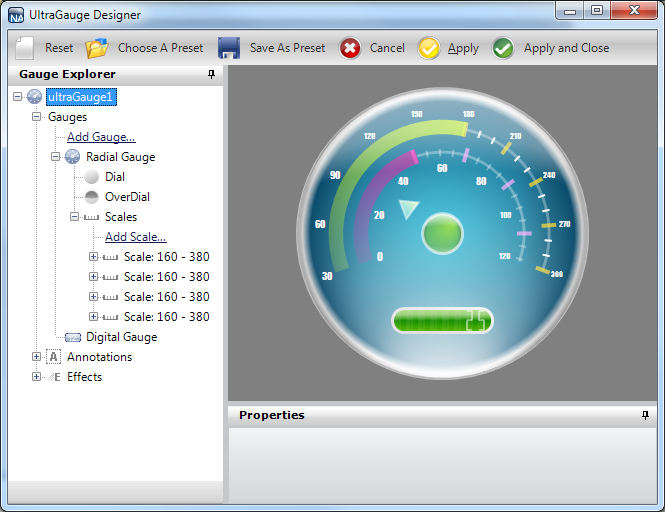
This topic is a continuation of Creating a Complex Gauge Using the Gauge Designer Part 4 of 5. This procedure guides you through the process of adding a Digital gauge to the existing Radial gauge.
In the Gauge Explorer, expand Gauges.
Click Add Gauge… and select New Digital Gauge.
In the Properties panel, click the Gauge Layout tab. In the Bounds pane, set the following properties:
X — 0
Y — 70
Width — 100
Height — 18
Units — Percent
In the Margin pane of the Gauge Layout tab, set the following properties:
Top — 15
Bottom — 15
Left — 100
Right — 100
Units — Pixels
In the Misc pane of the Gauge Layout tab, set the following properties:
Mode — FourteenSegment
Text — 025
Extent — 48
Digits — 8
Digit Spacing — 6
In the Properties panel, click the Appearance tab. In the Brush pane, add the following brush elements with the specified properties:
Multi-Stop Linear Gradient brush element
ColorStop 1 — Offset = 0, Color = Color.FromArgb(93, 186, 0)
ColorStop 2 — Offset = 0.5, Color = Color.FromArgb(23, 141, 0)
ColorStop 3 — Offset = 1, Color = Color.FromArgb(93, 186, 0)
Angle — 90 (Property displays at the bottom of the Gradient Editor drop-down window.)
Multi-Stop Linear Gradient brush element
ColorStop 1 — Offset = 0, Color = Color.FromArgb(150, 255, 255, 255)
ColorStop 2 — Offset = 0.2586207, Color = Color.FromArgb(125, 255, 255, 255)
ColorStop 3 — Offset = 0.5103447, Color = Transparent
ColorStop 4 — Offset = 1, Color = Transparent
Angle — 90 (Property displays at the bottom of the Gradient Editor drop-down window.)
In the Stroke pane of the Appearance tab, set the following properties:
Simple Gradient brush element
StartColor — WhiteSmoke
EndColor — Gainsboro
Gradient Style — Backward Diagonal
Thickness — 5
Click the Digit Appearance tab. In the Font Brush pane, set the following properties:
Type — Solid
Color — Color.FromArgb(255, 255, 255)
In the Unlit Brush pane of the Digit Appearance tab, set the following properties:
Type — Solid
Color — Color.FromArgb(30, 255, 255, 255)
