

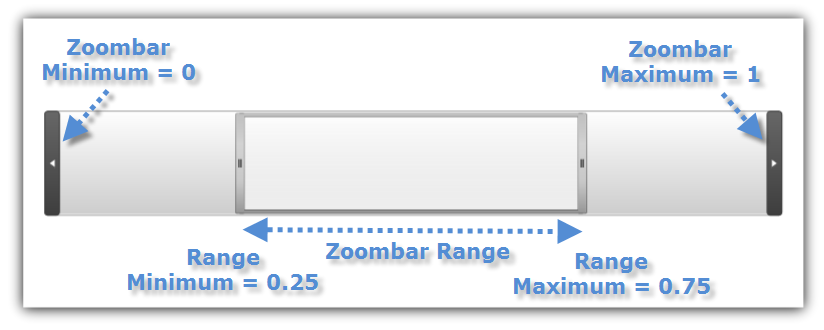
The xamZoombar™ control consists of a thumb, two buttons, and a preview area. The thumb controls the visible area as well as the zoom range. You can change the size of the thumb to increase or decrease the zoom scale. To change the zoom range, slide the thumb back and forth.
The following table explains in detail the most important properties of the xamZoombar control:
This section will show you how to setup your project for the xamZoombar control in Microsoft® Visual Studio® and Expression Blend®.
Create a Microsoft® WPF® project in Visual Studio.
Add the following NuGet package reference to the application:
Infragistics.WPF.DataVisualization
For more information on setting up the NuGet feed and adding NuGet packages, you can take a look at the following documentation: NuGet Feeds.
Add the following namespace declarations for xamZoombar control.
In XAML:
<xmlns:ig=http://schemas.infragistics.com/xaml/>
In Visual Basic:
Imports Infragistics.Controls
In C#:
using Infragistics.Controls;
Add an instance of the xamZoombar control with the following attributes:
In XAML:
<ig:XamZoombar x:Name="zoombar" Minimum="0" Maximum="1">
        <ig:XamZoombar.Range>
                <ig:Range Minimum="0.25" Maximum="0.75" />
        </ig:XamZoombar.Range>
</ig:XamZoombar>
In Visual Basic:
Dim zoombar As New XamZoombar()
zoombar.Minimum = 0
zoombar.Maximum = 1
zoombar.Range = New Range() With { Key .Minimum = 0.25, Key .Maximum = 0.75 }
In C#:
XamZoombar zoombar = new XamZoombar();
zoombar.Minimum = 0;
zoombar.Maximum = 1;
zoombar.Range = new Range {Minimum = 0.25, Maximum = 0.75};
Save and run the project. The xamZoombar control will load and display a thumbnail in the middle of the control as shown in the following image.
Create a Microsoft® WPF® project in Expression Blend.
Add the following NuGet package reference to the application:
Infragistics.WPF.DataVisualization
For more information on setting up the NuGet feed and adding NuGet packages, you can take a look at the following documentation: NuGet Feeds.
Select the xamZoombar control form the toolbox and drag it to the design surface.
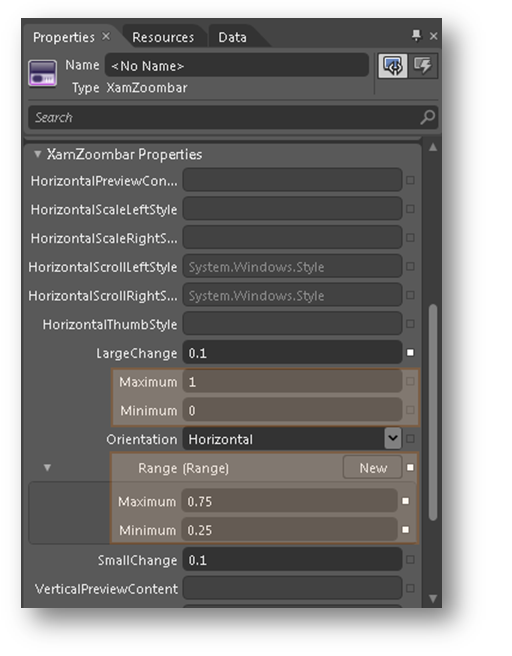
In the xamZoombar control properties tab, scroll down to the xamZoombar properties.
Save and run the project. The xamZoombar control will load and display a thumbnail in the middle of the control as shown in the following image.
