This topic provides a conceptual overview of the XamRadialGauge™ control’s ranges. It describes the properties of the ranges and provides an example of how to add ranges to the radial gauge.
The following topics are prerequisites to understanding this topic:
This topic contains the following sections:
A range highlights a set of continuous values bound by a specified minimum and maximum value on a gauge scale. You can add multiple ranges to a scale, specifying different brushes, along with starting and ending values. To add a range to the XamRadialGauge control, create a RadialGaugeRange object and add it to the Ranges collection.
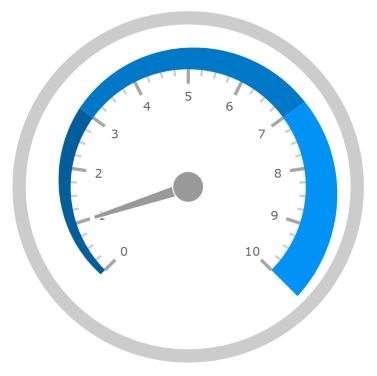
The following image is a preview of the XamRadialGauge control with the three ranges added to it (0-3; 3-7 and 7-10).

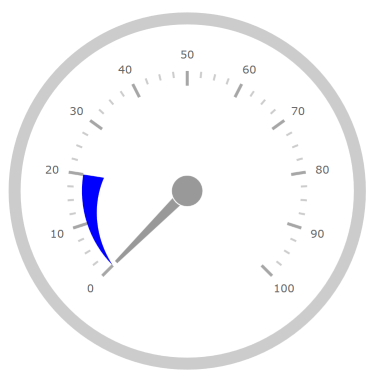
The following screenshot demonstrates how the XamRadialGauge control renders using this RadialGaugeRange configuration:

Following is the code that implements this example
In XAML:
<ig:XamRadialGauge x:Name="radialGauge" >
   <ig:XamRadialGauge.Ranges>
      <ig:RadialGaugeRange
         Brush="Blue"
         StartValue="0"
         EndValue="20"
         OuterStartExtent=".5"
         OuterEndExtent=".4"/>
   </ig:XamRadialGauge.Ranges>
</ig:XamRadialGauge>
In C#:
var radialGauge = new XamRadialGauge();

var range1 = new RadialGaugeRange
range1.Brush = new SolidColorBrush(Colors.Blue);
range1.StartValue = 0;
range1.EndValue = 20;
range1.OuterStartExtent = 0.5;
range1.OuterEndExtent = 0.4;
radialGauge.Ranges.Add(range1);
The following topics provide additional information related to this topic: