' Set up the editable range
Me.WebSlider1.MaxValue = 100
Me.WebSlider1.MinValue = 0
' Set the starting value of the WebSlider as the starting TextBox value
Me.WebSlider1.Value = Int32.Parse(Me.TextBox1.Text)
The WebSlider™ control allows for easy, user-friendly data manipulation.
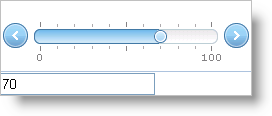
You will learn how to set up WebSlider to change the value of a textbox. Essentially, the WebSlider is used as an editor for the value in a TextBox.
Create a new ASP.NET AJAX-Enabled Web Site.
Drag an ASP.NET Ajax ScriptManager instance onto the WebForm.
Drag the WebSlider control from the Microsoft® Visual Studio® toolbox onto the WebForm.
Accept the prompt to add the default AppStylist style.
Drag an ASP.NET TextBox control from the Visual Studio toolbox onto the WebForm.
Set the TextBox control’s Text property to 50\.
Double-click the WebForm to add an event handler for the page’s load event.
In the load event, add the following code to set up the editable range and starting value for the WebSlider control.
In Visual Basic:
' Set up the editable range Me.WebSlider1.MaxValue = 100 Me.WebSlider1.MinValue = 0 ' Set the starting value of the WebSlider as the starting TextBox value Me.WebSlider1.Value = Int32.Parse(Me.TextBox1.Text)
In C#:
// Set up the editable range
this.WebSlider1.MaxValue = 100;
this.WebSlider1.MinValue = 0;
// Set the starting value of the WebSlider as the starting TextBox value
this.WebSlider1.Value = Int32.Parse(this.TextBox1.Text);
Create an event handler for WebSlider’s ValueChanged event to change the value of the text box.
In JavaScript:
function WebSlider1_ValueChanged(sender, e)
{
    var textBox = document.getElementById("TextBox1");
    textBox.value = e.get_newValue();
}
Be sure to hook up the event handler to WebSlider’s client-side event. You can do this by inputting the name of the JavaScript funtion as the value for the ValueChanged field under ClientEvents in WebSlider’s property window.
Run the application. You can use the WebSlider control to change the value of the text box.
