Shared dashboards are ideal for cross-team collaboration. There are so many possibilities when it comes to sharing in Reveal. Depending on your own sharing rights you can give other users and teams different access permissions to the content you share with them.
Below you will find the specifics of access permissions in the three available sharing scenarios:
To share a dashboard created by you with individual users you need to:
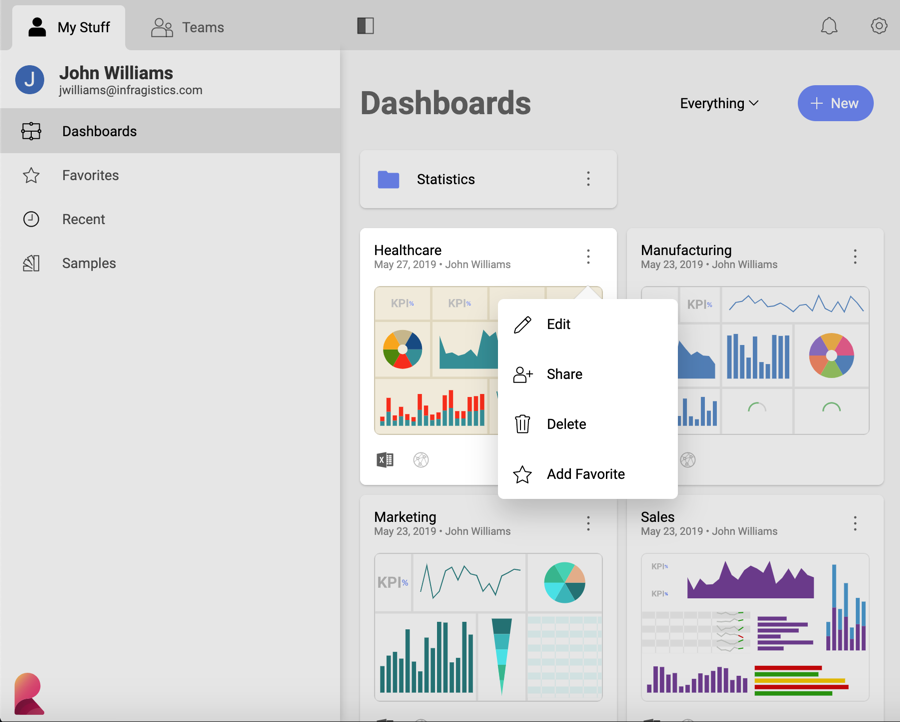
Access the Share dialog - Select the overflow button in the top right-hand corner of a dashboard or a folder and choose Share.
Sharing a dashboard means users will get a local copy of your dashboard; they will not be able to edit your local copy.

Once you share a folder with other people, the new files will appear in their accounts as well under the Shared with Me section.

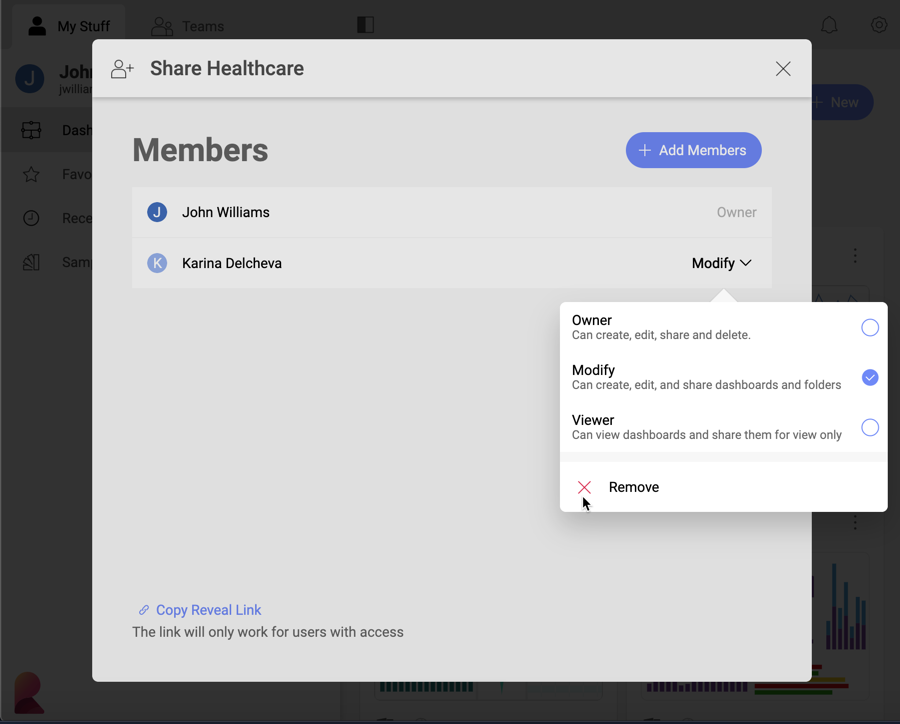
Choose the users you want to share the dashboard with - Enter the e-mail addresses of the people you want to invite and set the level of access those people will have over the shared dashboard. The available options are:
Owner permissions - the user can create, edit, share and delete.
Modify permissions - the user can create, edit and share but cannot delete the dashboard or folder.
Viewer permissions - the user can view and share dashboards and folders for view only.
After setting the access level, click/tap Send Invites. The dashboard is shared automatically with members of your Organization. Other users will have the dashboard shared with them only after they accept the invitation.

You can change the access level for users at any time by accessing the Share menu. You will see a list of all users you have shared the dashboard with and their access level. You can change their access level by selecting a new one from the dropdown menu next to their name.
You can also unshare any dashboard at any time by accessing the Share dialog and selecting Remove from the dropdown menu next to any member’s name.

Any member of a team can share the team’s dashboards with other users. To do this, go to the Teams tab and choose a dashboard from the Dashboards section. Then, follow the steps in Sharing your Own Dashboard with Other Users.
The main difference between sharing a team’s dashboard and a dashboard created by you is the access permissions you can give to the users you share the dashboard with. Depending on your role in the team you can have one, two or all the access permissions options available to choose from.
Your role in the team can be:
Owner - have full access to the team’s dashboards, including editing, sharing and deleting them.
Contributor - can create, edit and share dashboards and folders but cannot delete them.
Viewer - can view and share dashboards for view only.
Here you can see the access permissions options every team member can give when sharing a dashboard:
You can share a dashboard you created or a team’s dashboard with a whole team instead of individually with every team member. To do this, choose a dashboard from the Dashboards section in My Stuff or Teams tab. Then follow the steps in Sharing your Own Dashboards with Other Users.
When setting access permissions for the whole team, you must take into account that individual members will get only the highest permissions they have for the team’s dashboards.
For example, if you give Owner permissions to the team, Viewers in this team will have only Viewer permissions, Contributors will get as high as Modify permissions and only the Owners can get the full Owner access to the dashboard. If you give Viewer permissions to the team, even members with an Owner role will have only Viewer permissions to this dashboard.
Look at the table below for a quick reference of what permissions can every team member get depending on their role in the team:
When you have used a data source file located on a cloud service to build a dashboard, you will need to grant access to this file to successfully share your dashboard. To learn more, read Sharing Dashboards with Cloud Files as a Data Source.